Alfa 4C Center Console
moe 5. März 2023 18:44
Ok, we‘re done and a nice Italian espresso is well deserved.
moe 5. März 2023 18:44
moe 5. März 2023 18:44
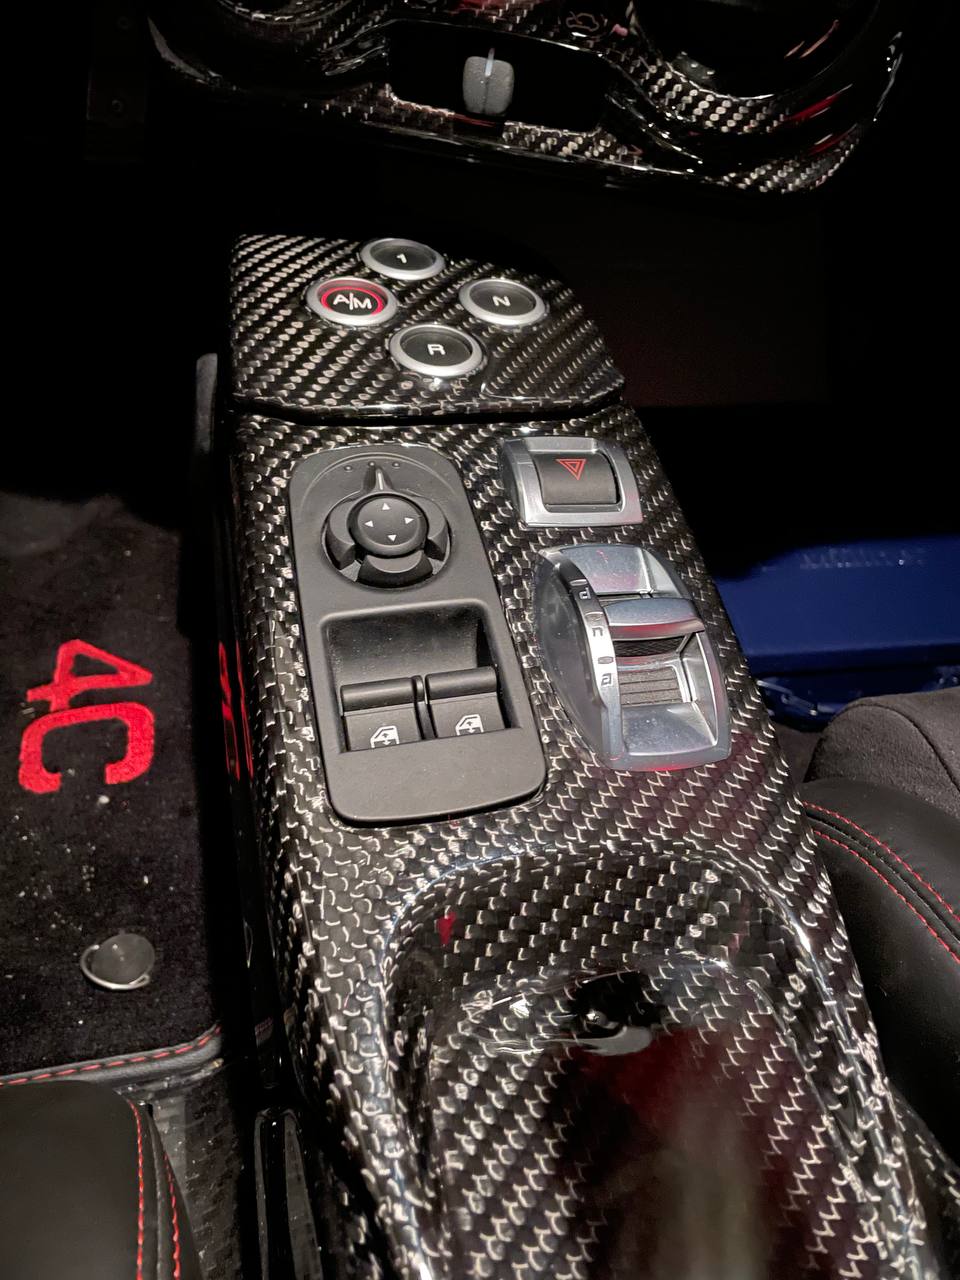
Wow, compared to the cheap plasticky look of the original, this looks marvelous.
moe 5. März 2023 18:43
moe 5. März 2023 18:43
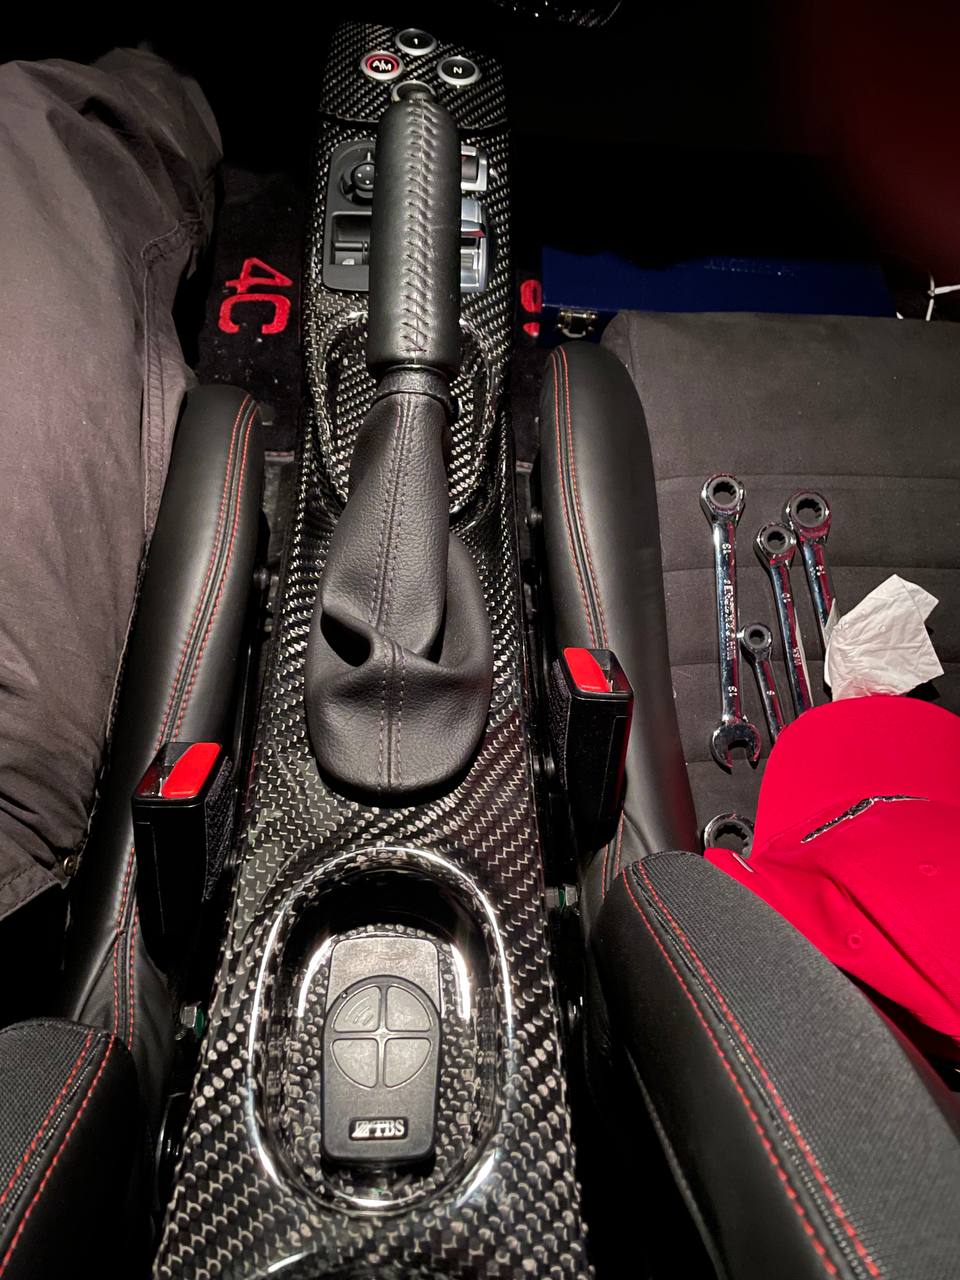
So, finally we are done and the new carbon fiber center console looks like this.
moe 5. März 2023 18:43
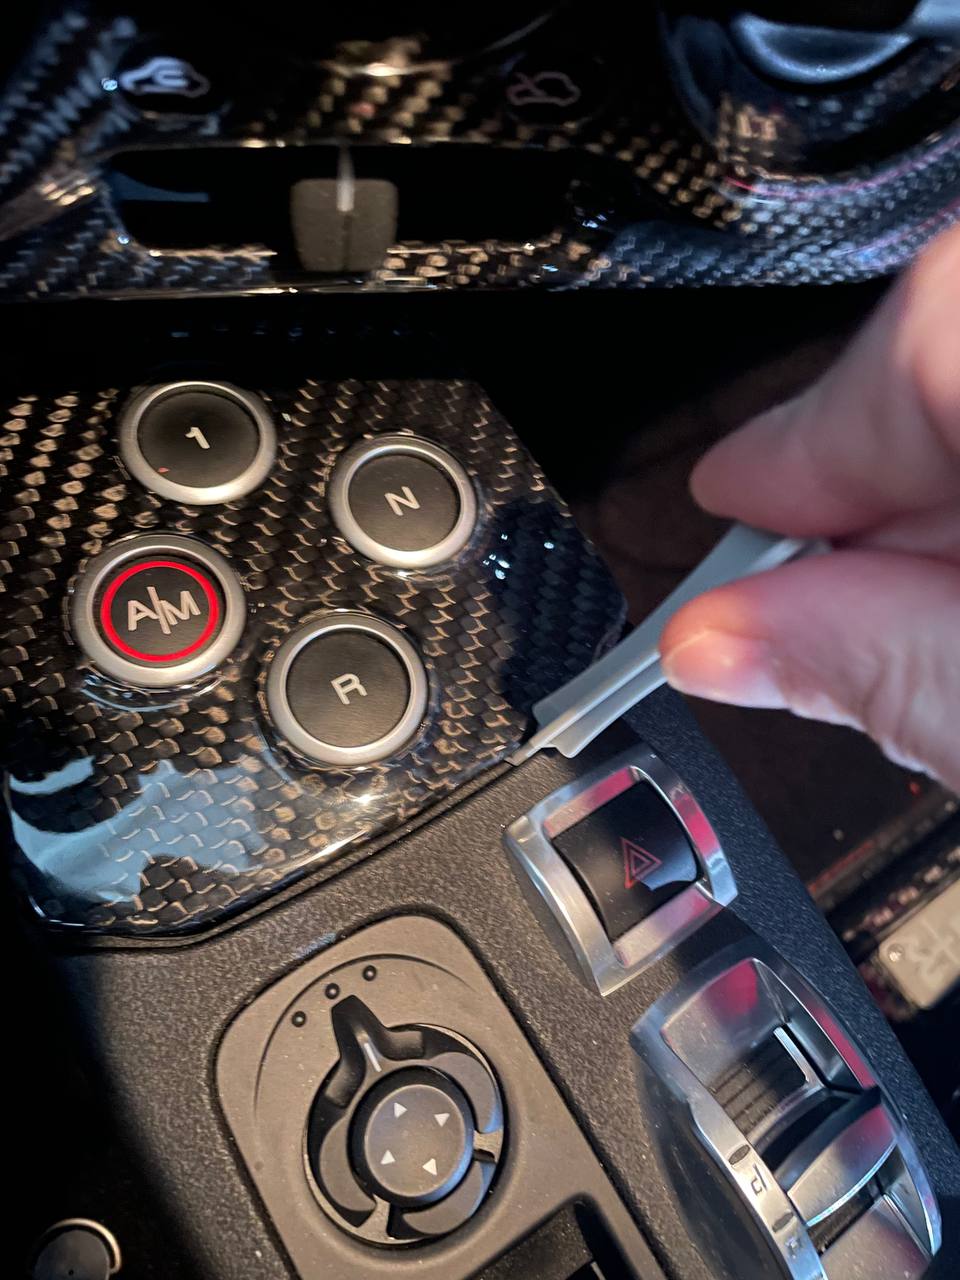
With the opening slot for the windows/mirror switch panel being prepared, the harness can be connected and the panel clipped in. For the remaining gear selector panel, again, the carbon fiber material is too thin for the plastic hooks to grab a tight hold. Therefore, that is too loose and the panel wobbles around. To fix that, I used foamy window sealing tape (2-3mm thickness do the trick as the foam material is compressed to the right height) and put that on the downside (facing to the center console) all the way along the edge of the gear selector panel. That effectively bolsters up the fitting so that the panel sits nice and tight.
moe 5. März 2023 18:22

moe 5. März 2023 18:22
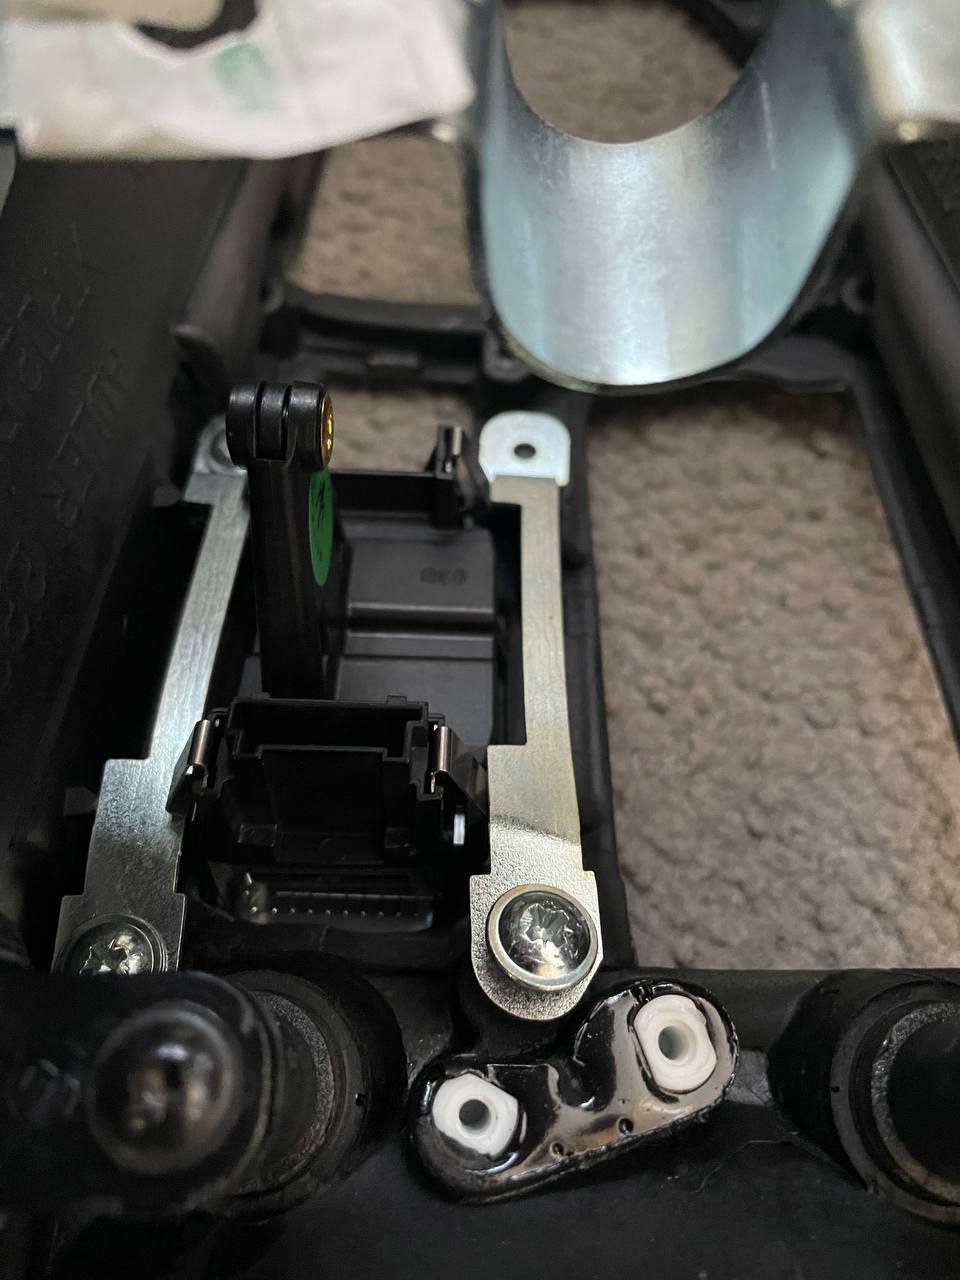
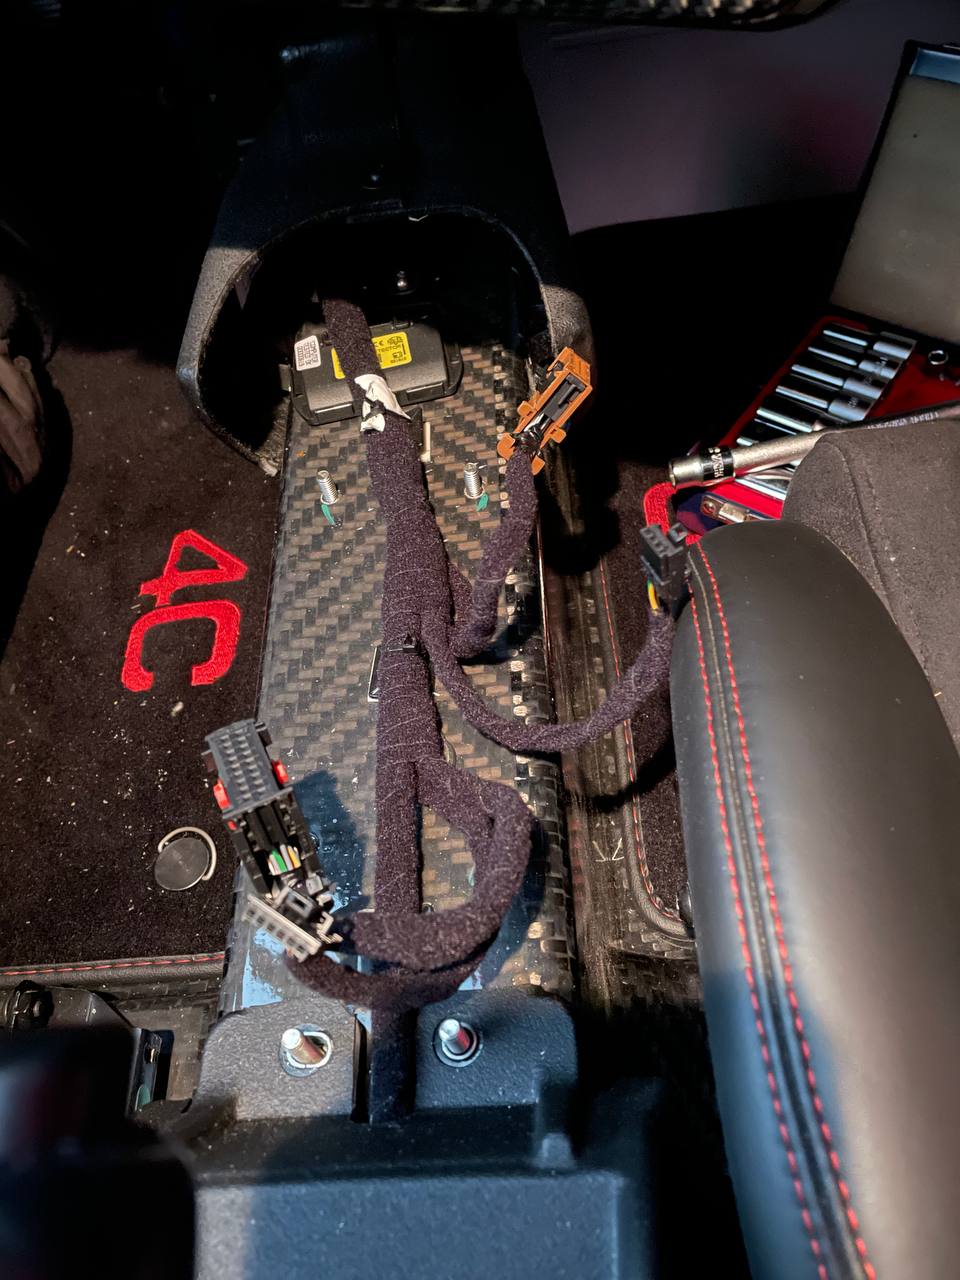
Once the metal brackets are mounted to the carbon fiber center console, it can be screwed onto the car with the corresponding nuts and the harnesses for the DNA selector and the hazard indicator can be connected from underneath.
moe 5. März 2023 18:03
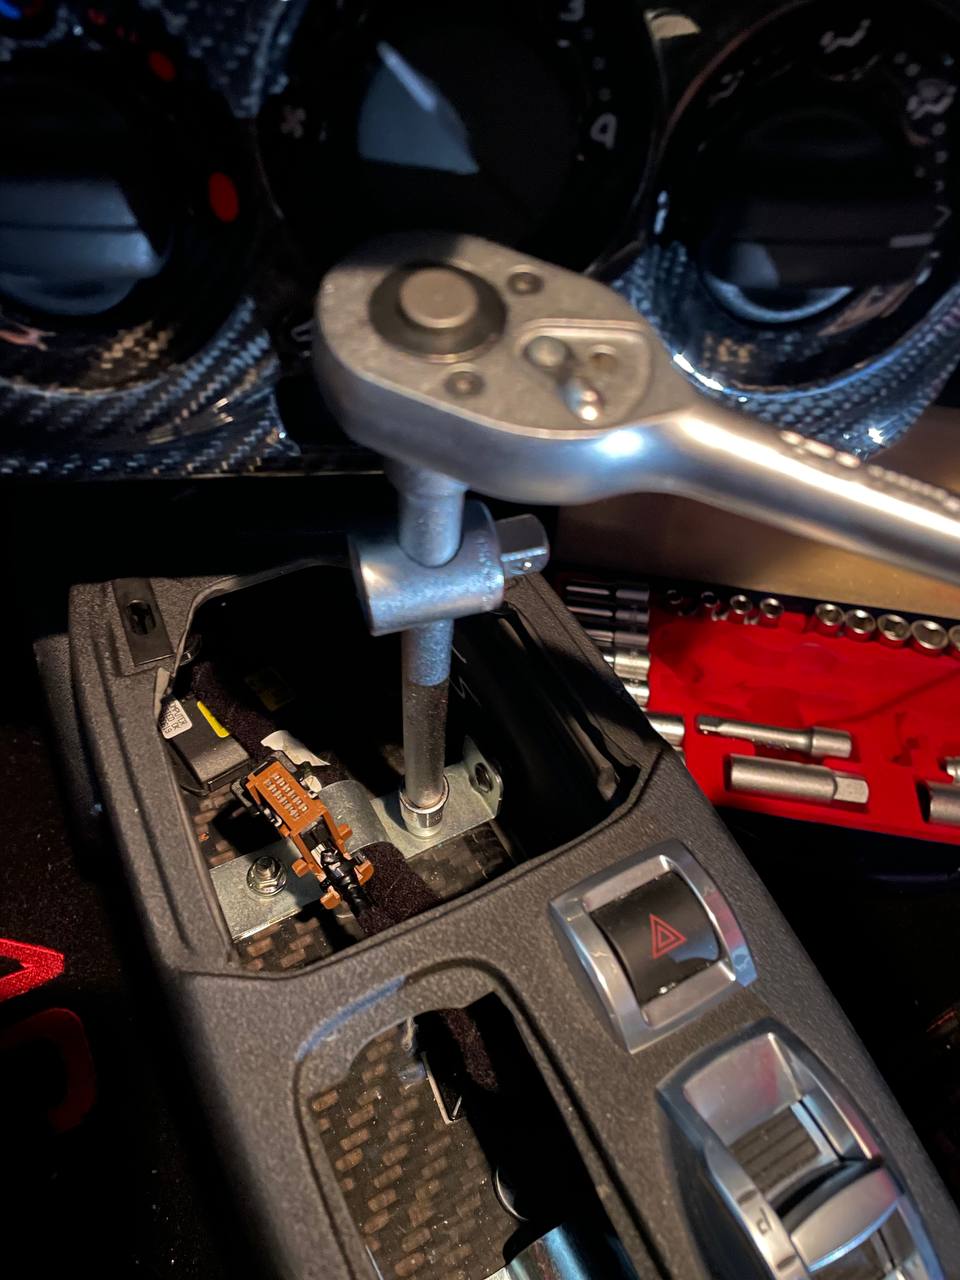
The metal brackets from the original part also need to be reused. Unfortunately, the screws provided with the Koshi center console are too big to fit through their holes. Thus, these need to be drilled with a metal drill bit (not even a millimeter larger than the original holes).
moe 5. März 2023 18:00
moe 5. März 2023 18:00
The opening slots that are too large lack any support that the clip tabs can grab. There are two solutions for that issue:
1 - either the respective switch panels are just glued with silicone or a hot-glue gun from underneath directly to the center console (tip: fix the panels from above with scotch tape so they don’t wobble around while glueing)
or
2 - the shims from the original console are used to build the corresponding support for the clip tabs. For this to work, screw mounts need to be constructed in exactly the right height for the clip tabs to grab a hold. Those screw mounts can be glued with two-component glue to the center console. If they are made from wood the screws will cut their threads by themselves… otherwise one would need to cut the thread correspondingly. Finally, this needs to look something like this.
moe 5. März 2023 17:10
The front piece is a little more complex: first, and while not being mounted anywhere, the opening slots which are too small (in my case those were the window/mirror switch panel slot as well as the left hole for the black holding clamp) need to filed carefully until they big enough. As there is not much material there to file and the edges are quite small, this needs to be done cautiously.
moe 5. März 2023 15:17
Let’s start with the easy part: the rear piece of the center console can be pulled over the handbrake lever with the 12 volt power plug already mounted (this just needs to be pressed in and it only fits in one position) the harness can be connected from underneath. Then the 4 screws are fixed and handbrake boot is pulled over the lever, clipped in and the button is closed again… so far, so good and that was easy.
moe 5. März 2023 15:04
First of all… while the Koshi part looks brilliant from the outside and finally also fits in perfectly into the car, hardly any opening slots for the switch panels has the right size:
the ones for the hazard indicator and the DNA selector are way too large and are no screw mounts (as for the original part) to fit any shims on that.
The opening slots for the window/mirror switch and even the holes for the black clamps fixing the gear selector are too small and the carbon fiber material is so thin that e.g. the gear selector that is just clipped onto the center console will not hold tightly, but rather wobble around quite a bit.
Thus, there is quite some work to do…
moe 5. März 2023 14:47
Ready for the assembly! I can only confirm everything that has been written under „Assembly“ in the already mentioned 4C forum post:
https://www.4c-forums.com/threads/diy-koshi-cf-center-console-replacement.36889/
At the same time, there are a few additional hints and tips to make it as easy as possible to get a perfect result.
moe 5. März 2023 14:36
moe 5. März 2023 14:35
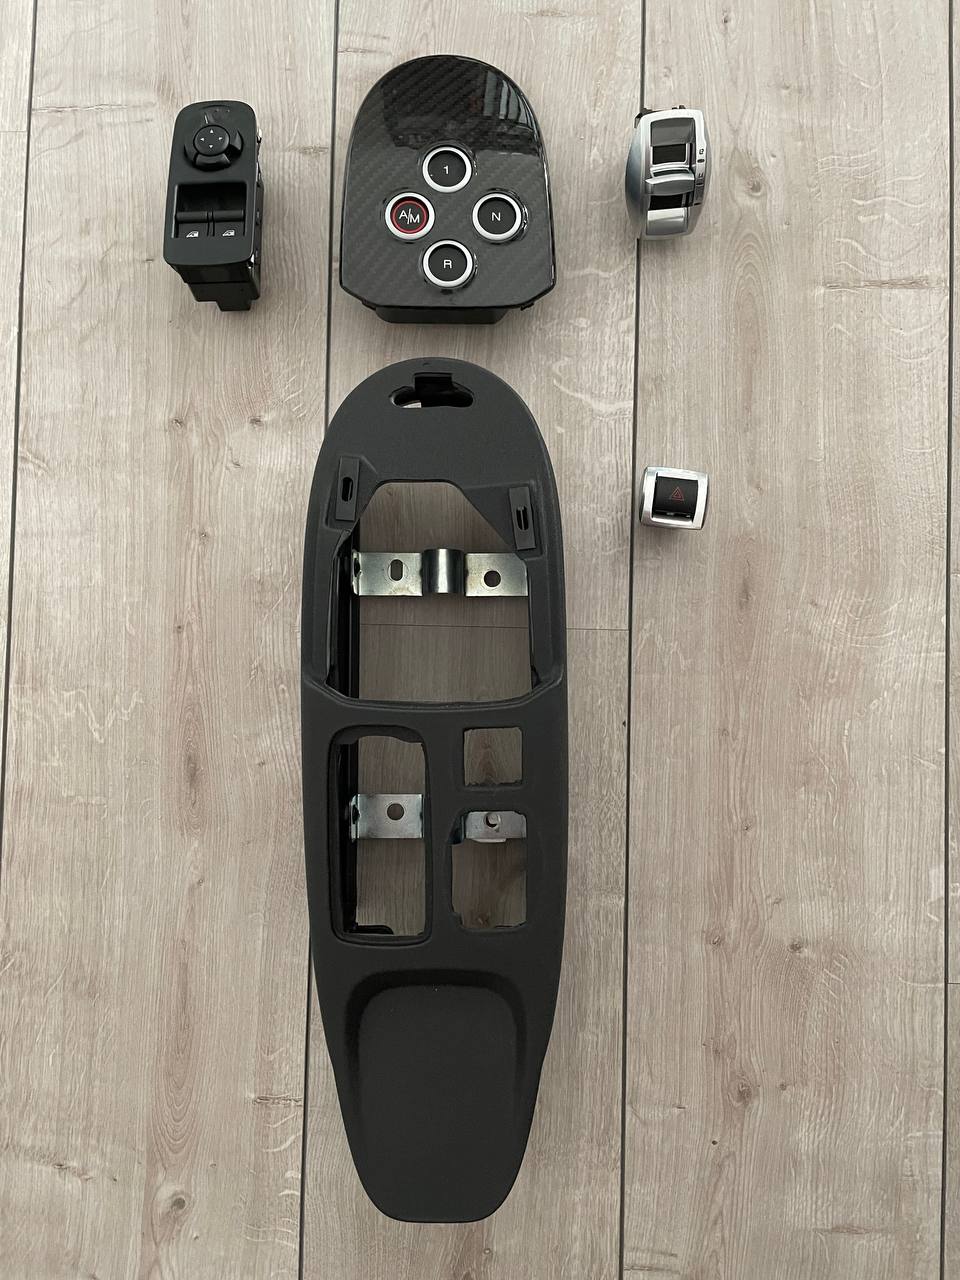
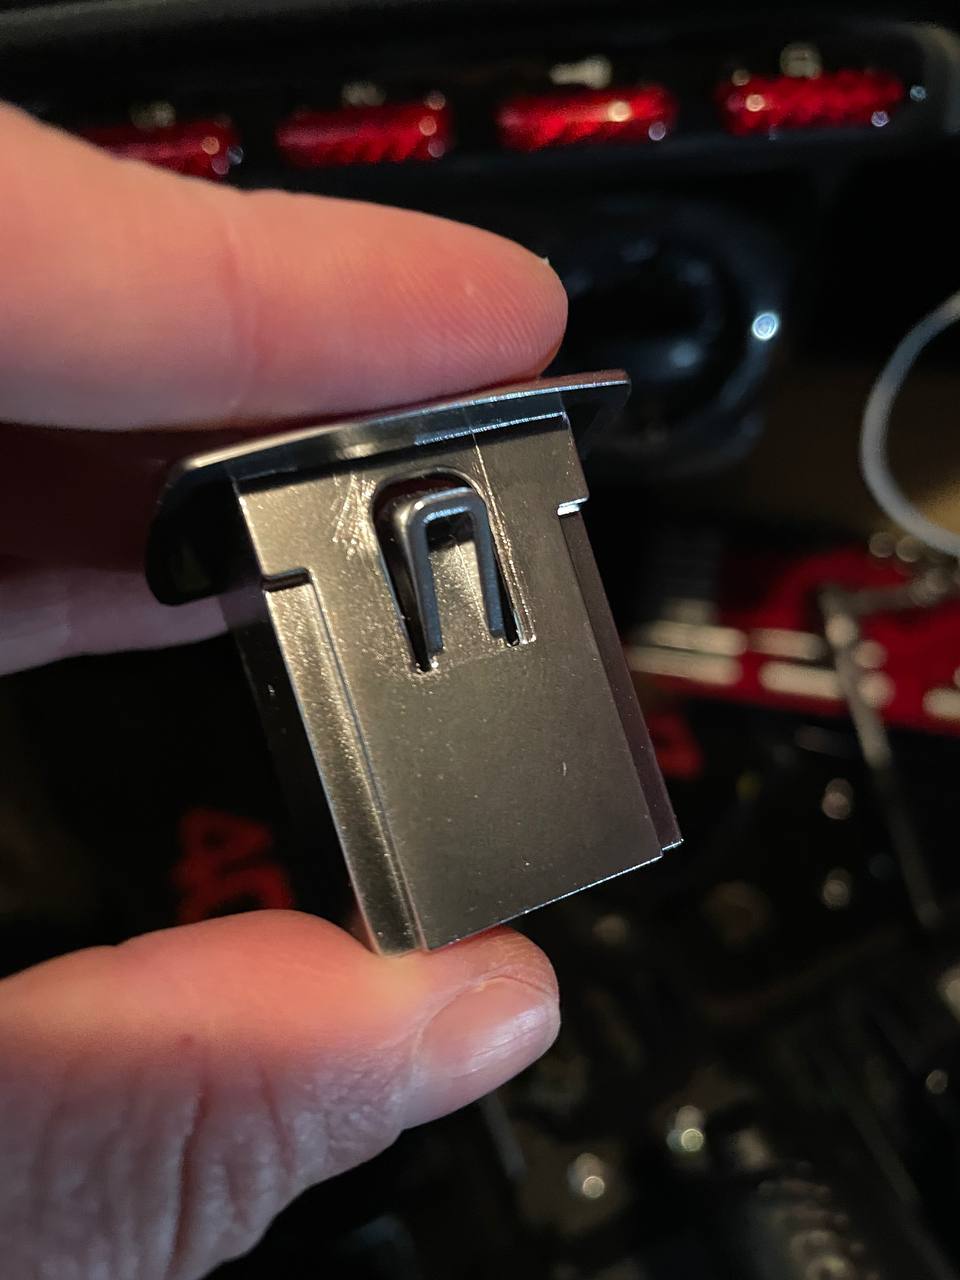
Here is the front part with all the switch panels dismounted… for re-assembly we need the two metal brackets that need to be unscrewed and (very important!) the two blacks clamps left and right at the front of the front piece of the center console. The clamps are required to fix the gear selector panel: the plastic hooks on that fit exactly into the holes of the clamps.
moe 5. März 2023 14:12
moe 5. März 2023 14:12
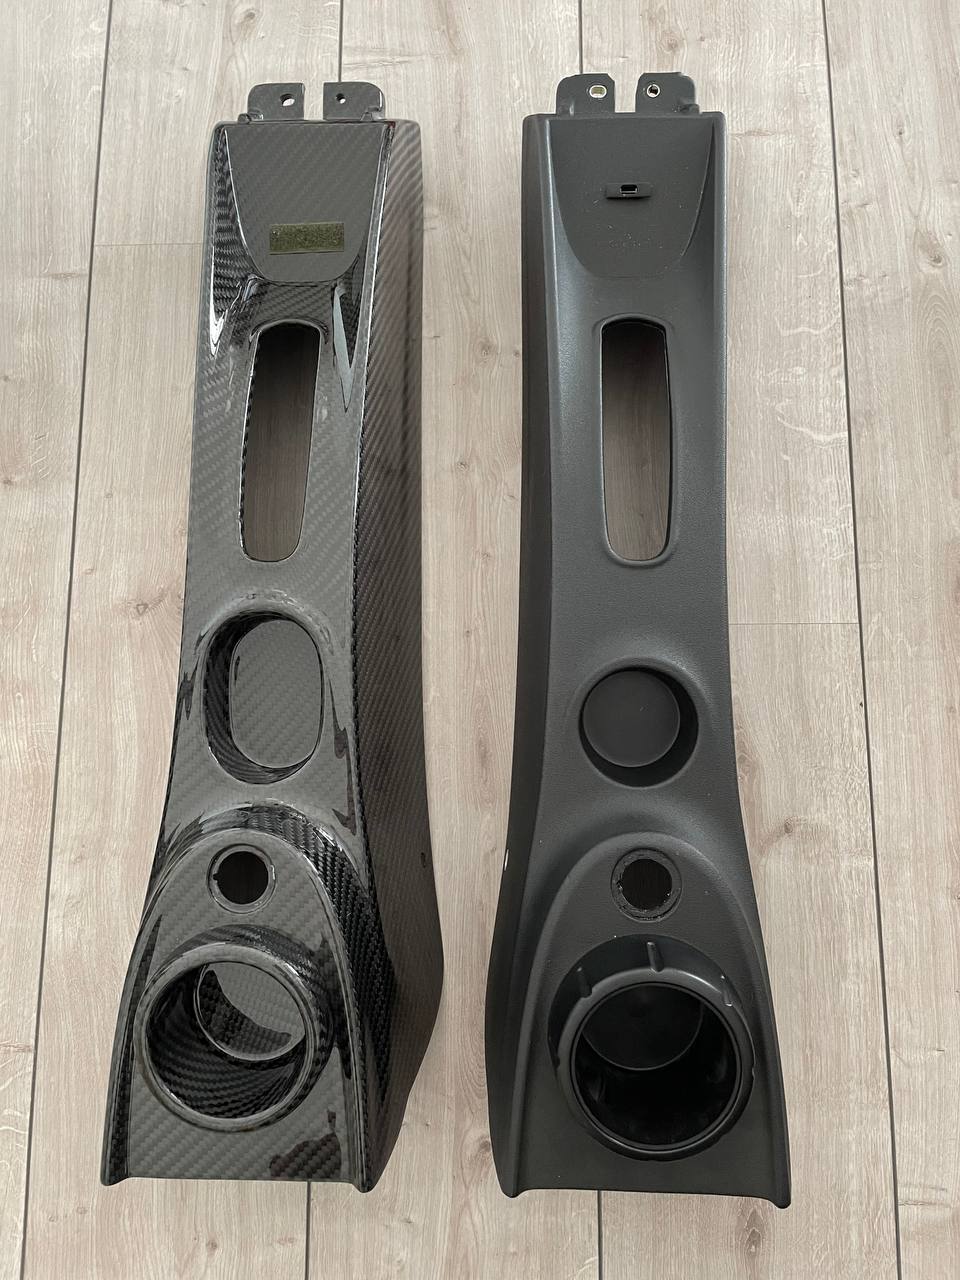
Right… now both the front and the rear part of the center console are removed from the car. Comparing the original plastic pieces with the new carbon fiber one, that’s quite a difference I’d say…
moe 5. März 2023 14:06
moe 5. März 2023 14:05
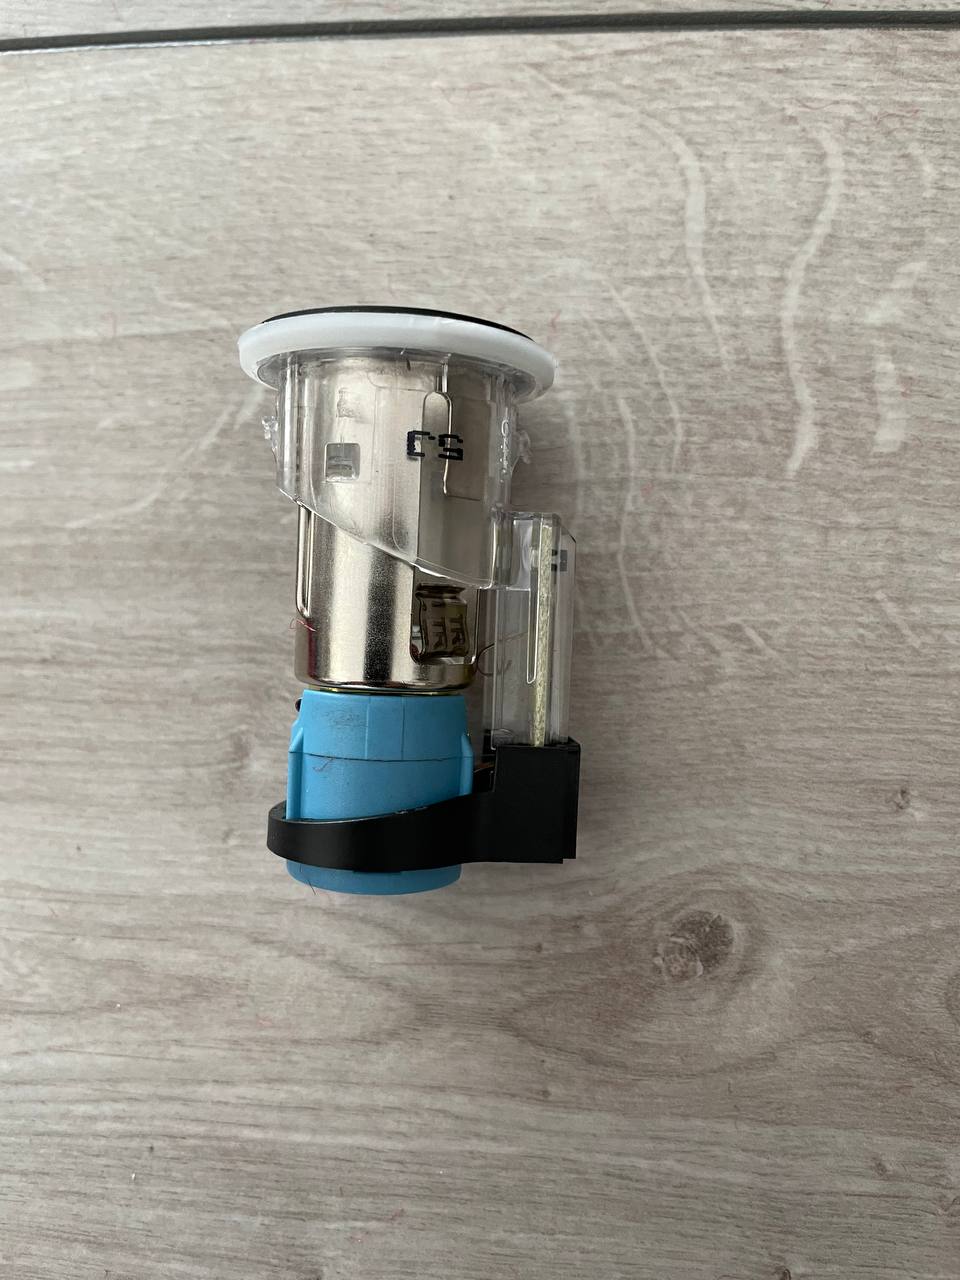
The complete 12 volt power plug assembled (but not mounted into the console) looks like this and the construction can be seen quite well.
moe 5. März 2023 14:03
moe 5. März 2023 14:02
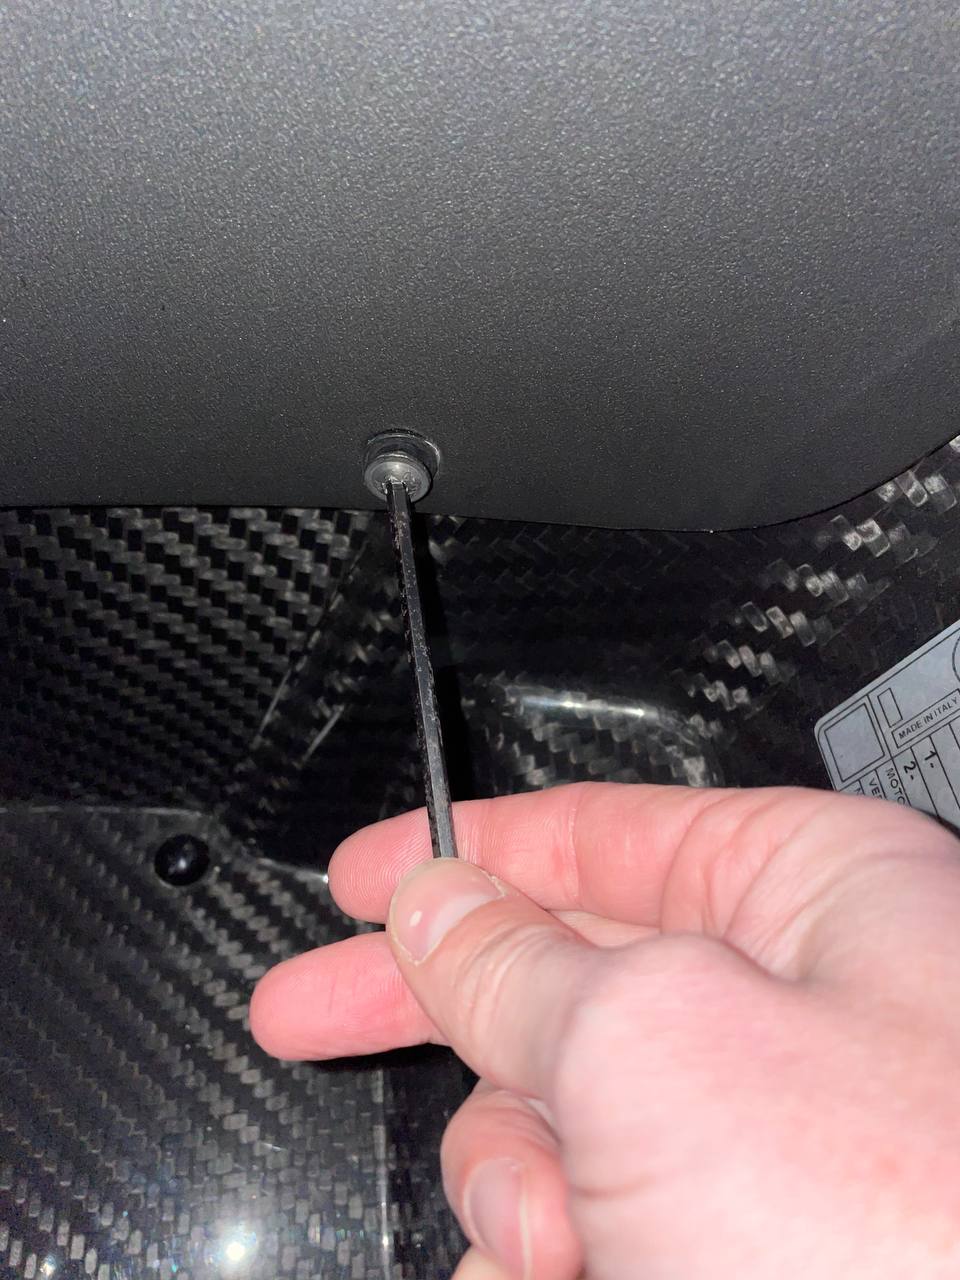
Now that the inner metal part of the plug is removed, the plastic hooks locking the outer plastic frame onto the center console are revealed. Those can now be accessed from inside the plastic frame (not from outside below). With a very small screwdriver (I used a small watchmaker tool for that) the plastic hooks can now be pulled inwards, effectively releasing the lock. With that done, the outer plastic frame can be pushed upwards, so that the 12 volt power plug can be removed completely and (more importantly) remains undamaged.
moe 5. März 2023 11:32
moe 5. März 2023 11:32
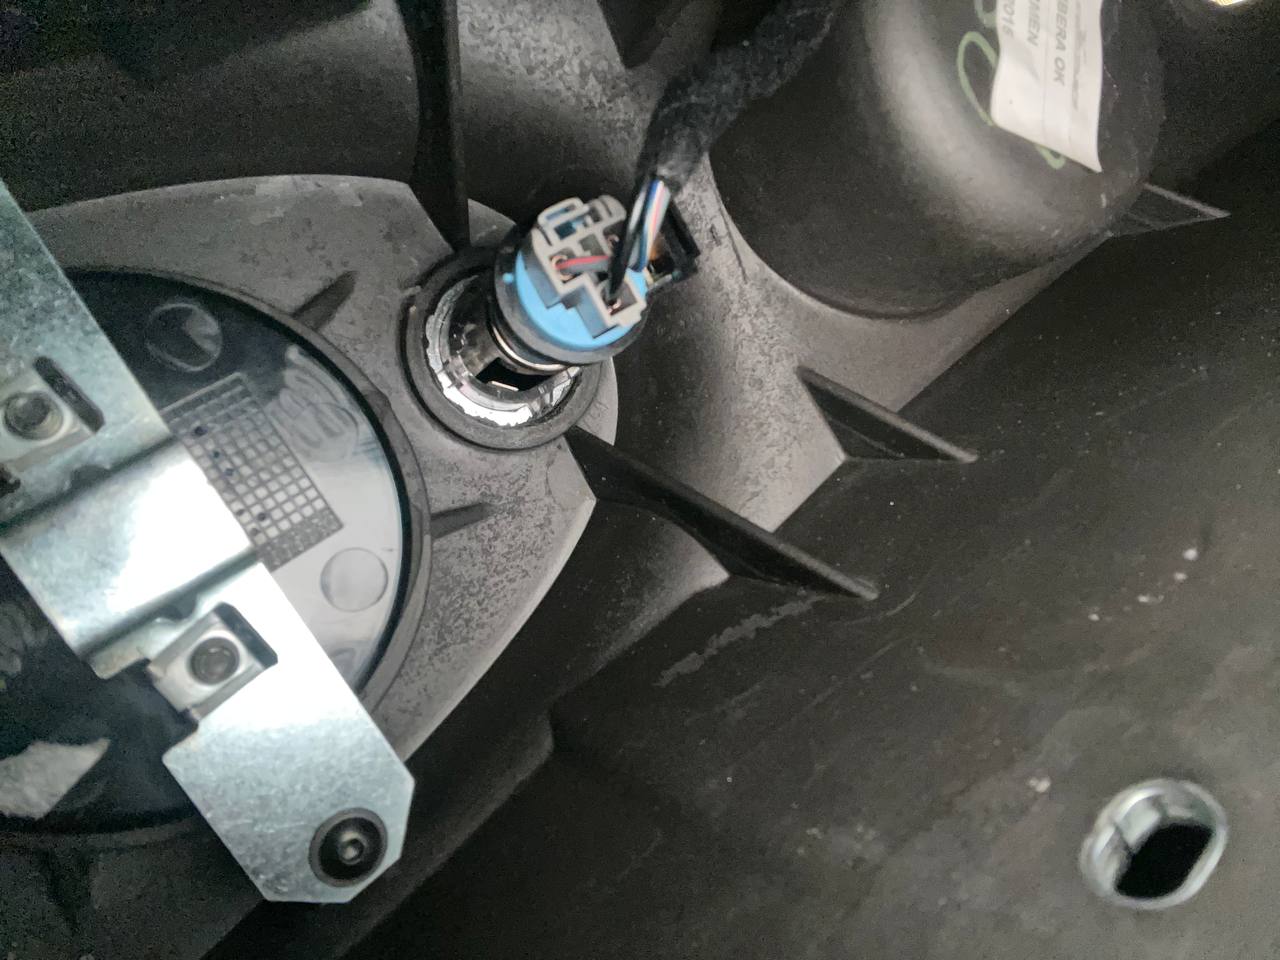
When it is pushed further upwards, there is a blue / turquoise plastic part with two plastic guides that fit exactly into two slots of the outer frame (that’s the clear plastic part). Thus, it’s fits in only one position… relevant for the re-assembly.
moe 4. März 2023 22:47
moe 4. März 2023 22:47
Ok, now things are getting a little difficult with the 12 volt power plug as can be read in the following post in the 4C forum:
https://www.4c-forums.com/threads/diy-koshi-cf-center-console-replacement.36889/
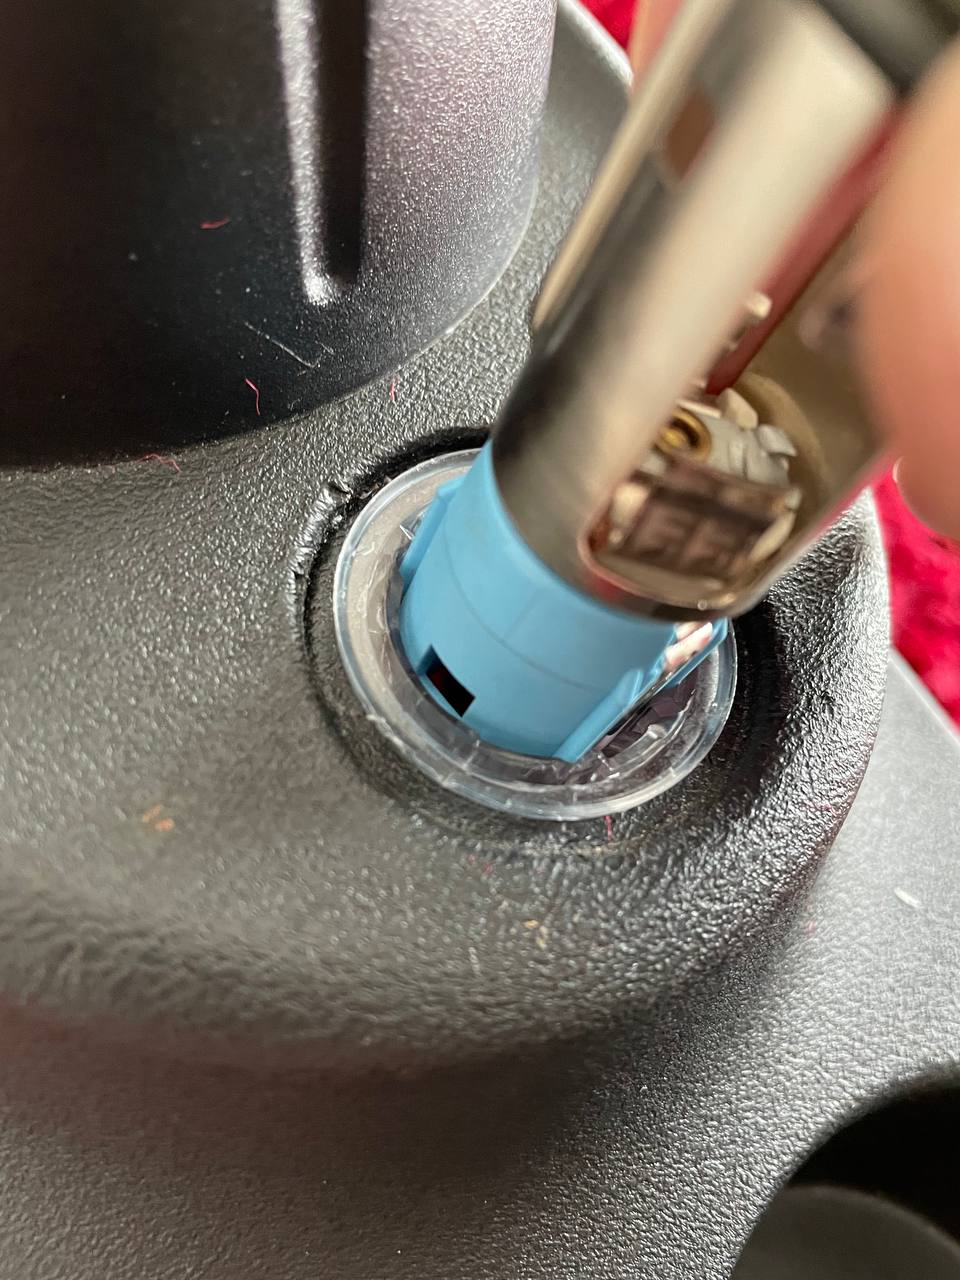
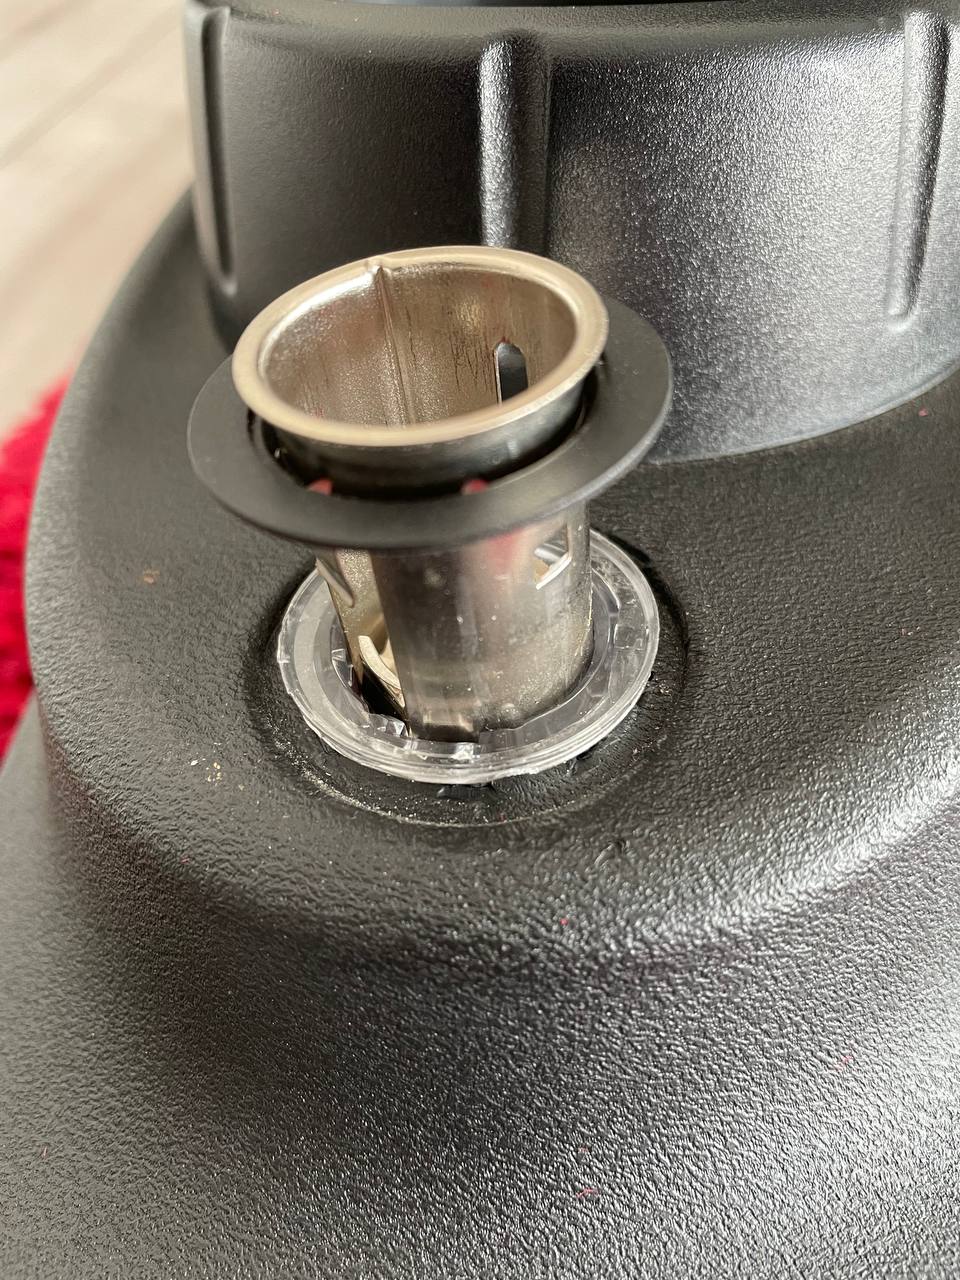
To avoid going into meltdown mode and, more importantly, not to give it a good whack from underneath to potentially break it, here is the solution to this: the inner metal part of the 12 volt plug can be moved upwards with the white plastic ring (or with it being removed) like this
moe 4. März 2023 22:47
moe 4. März 2023 22:47
With the 12 volt power plug being disconnected, the rear part of the center console can be removed. There are 4 screws: 2 of them in the front near where the 4 screws of the front part of the center console are located, the other two are at the back on the left and right side of the console. You will need to push / flip the seats forward to gain access to the screws.
moe 4. März 2023 22:47
moe 4. März 2023 22:47
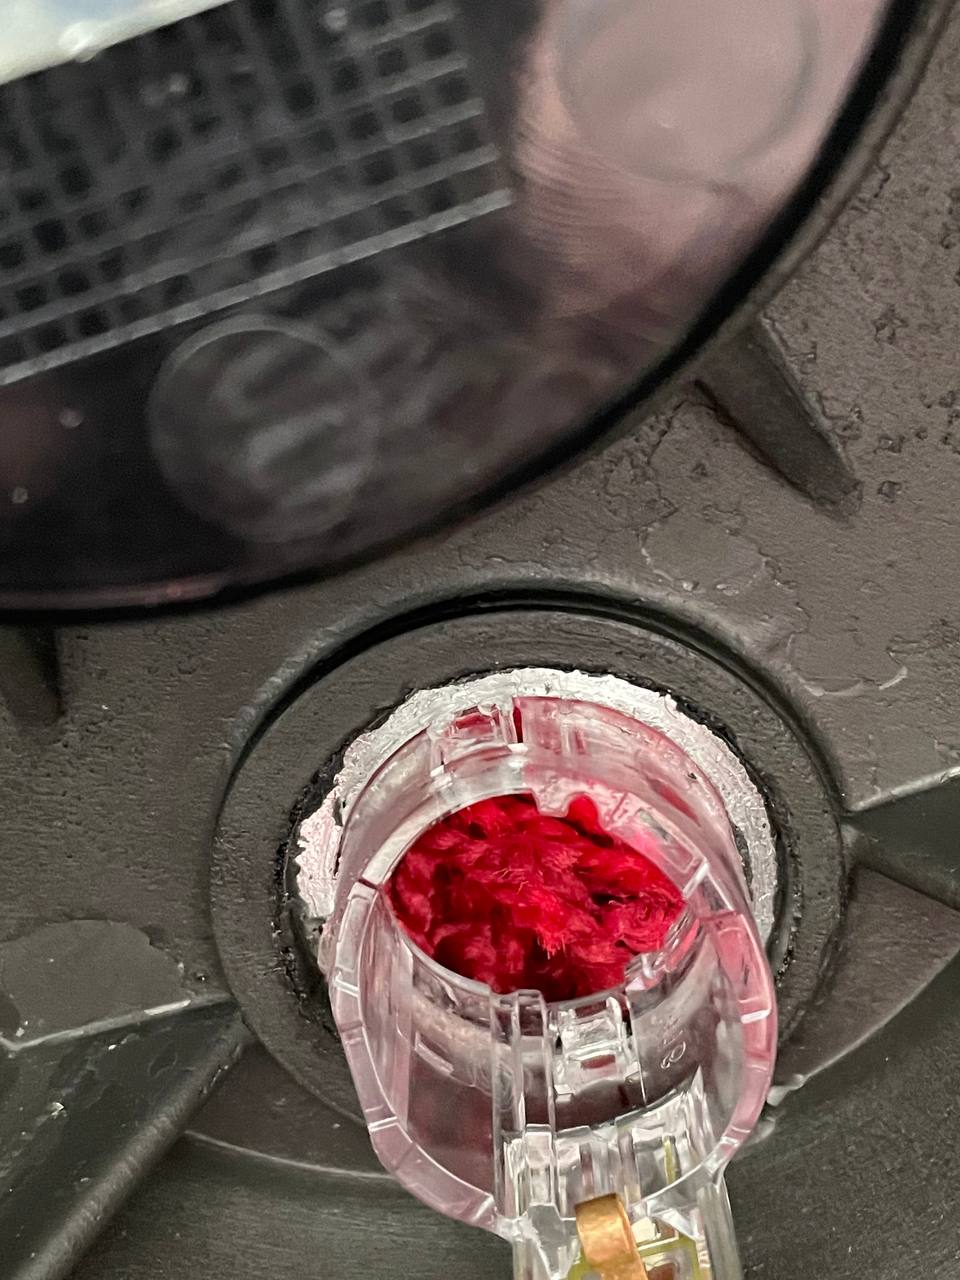
This is how the 12 volt power plug looks from inside the center console and the harness can be unplugged quite easily.
moe 4. März 2023 22:02
moe 4. März 2023 22:02
Then, carefully pull up the handbrake boot disengaging the retaining plastic clips that connect the handbrake boot to the center console.
moe 4. März 2023 22:00
moe 4. März 2023 21:58
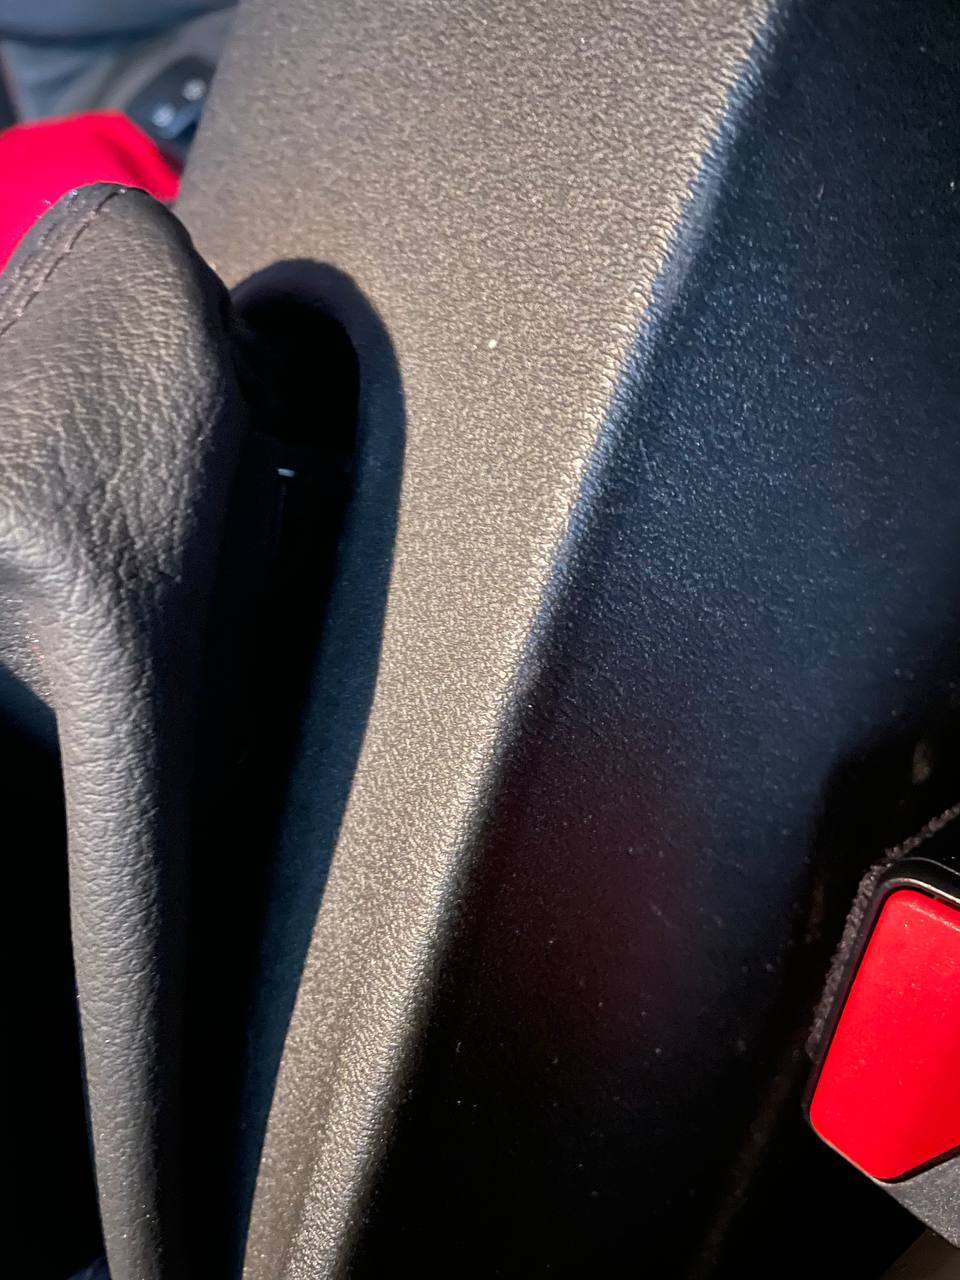
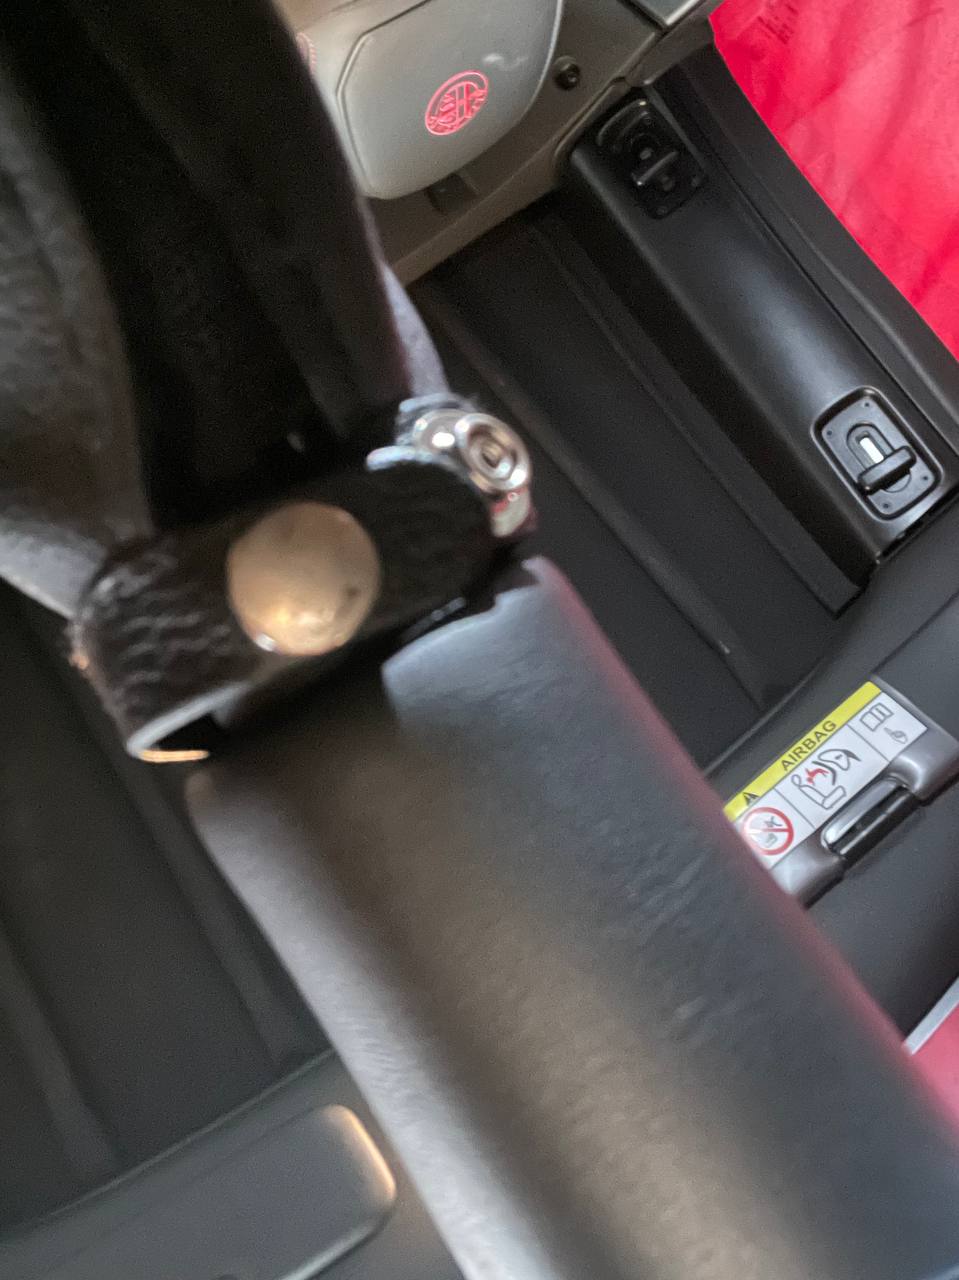
Next is the rear part. First thing to do here is to remove the handbrake boot. To do so, first open the snap button at the downside of the handbrake.
moe 4. März 2023 21:58
moe 4. März 2023 21:58
Now the front part and all the switch panels have been removed and the whole thing looks more or less like this.
moe 4. März 2023 21:55

moe 4. März 2023 21:55
To do so, again, the metal clips need to be pushed inwards and, up, there it goes 😉…
moe 4. März 2023 21:51

moe 4. März 2023 21:51
The DNA selector can now be easily dismounted from the center console as well: there are some metal shims underneath… unscrewing them lets the electrically disconnected DNA selector be pushed out of the center console.
moe 4. März 2023 21:47
moe 4. März 2023 21:46
Now, that all switch panel are disconnected and the front piece of the center console is dismounted, the outer silver frame of the hazard indicator can be accessed from down below: the lockings can be pressed inwards and the piece with the silver outer frame can be easily shifted upwards and removed from the center console.
moe 4. März 2023 21:36
NOTE: in Docron‘s post in the 4C forum this is done before disconnecting the DNA switch panel and the hazard indicator in order to lift up the console piece and disconnect the harnesses after turning it over. If the cables are long enough, this is definitely easier… in my case they weren’t (unfortunately), thus I had to take the way described here.
moe 4. März 2023 21:31
moe 4. März 2023 21:31
Now that all switch panels have been disconnected, the 4 10mm nuts that fix the center console to the carbon fiber chassis can accessed and unscrewed.
moe 3. März 2023 21:03
moe 3. März 2023 21:03
Once this is done, tadaaaa…, there is the plastic clip that needs to be pulled over the plastic hook / locking so that the harness can be released.
moe 3. März 2023 21:01

moe 3. März 2023 21:01
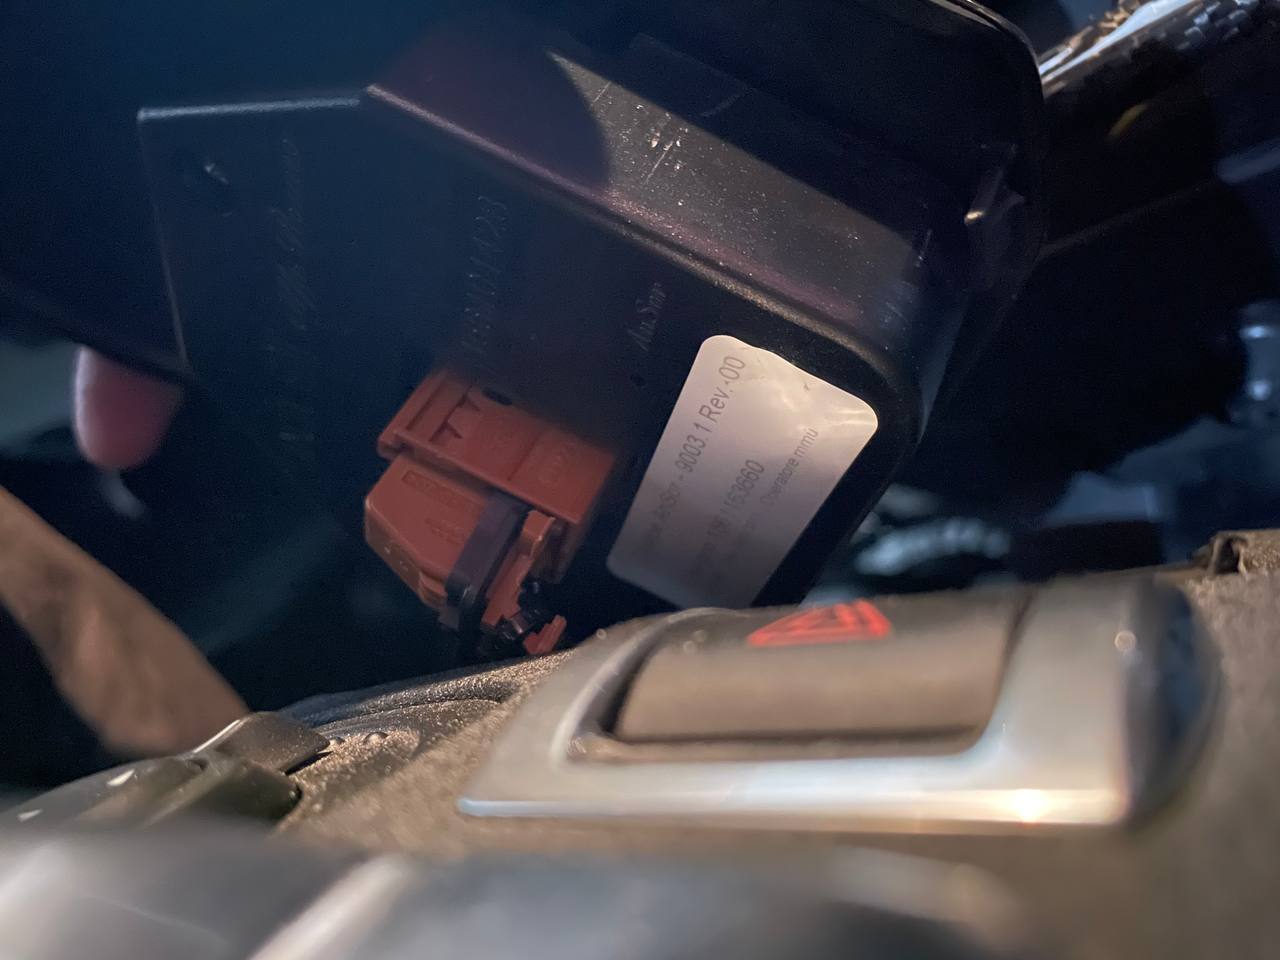
Next, let’s go for hazard indicator button. This actually consists of two pieces: the black plastic piece in the middle and the silver frame outside. From underneath there are two plastic clips left and right at the bottom of inner (black) plastic piece. Once these are pushed to the inside, the black plastic button can be pushed out upwards as can be seen in the picture.
moe 3. März 2023 20:51
moe 3. März 2023 20:51
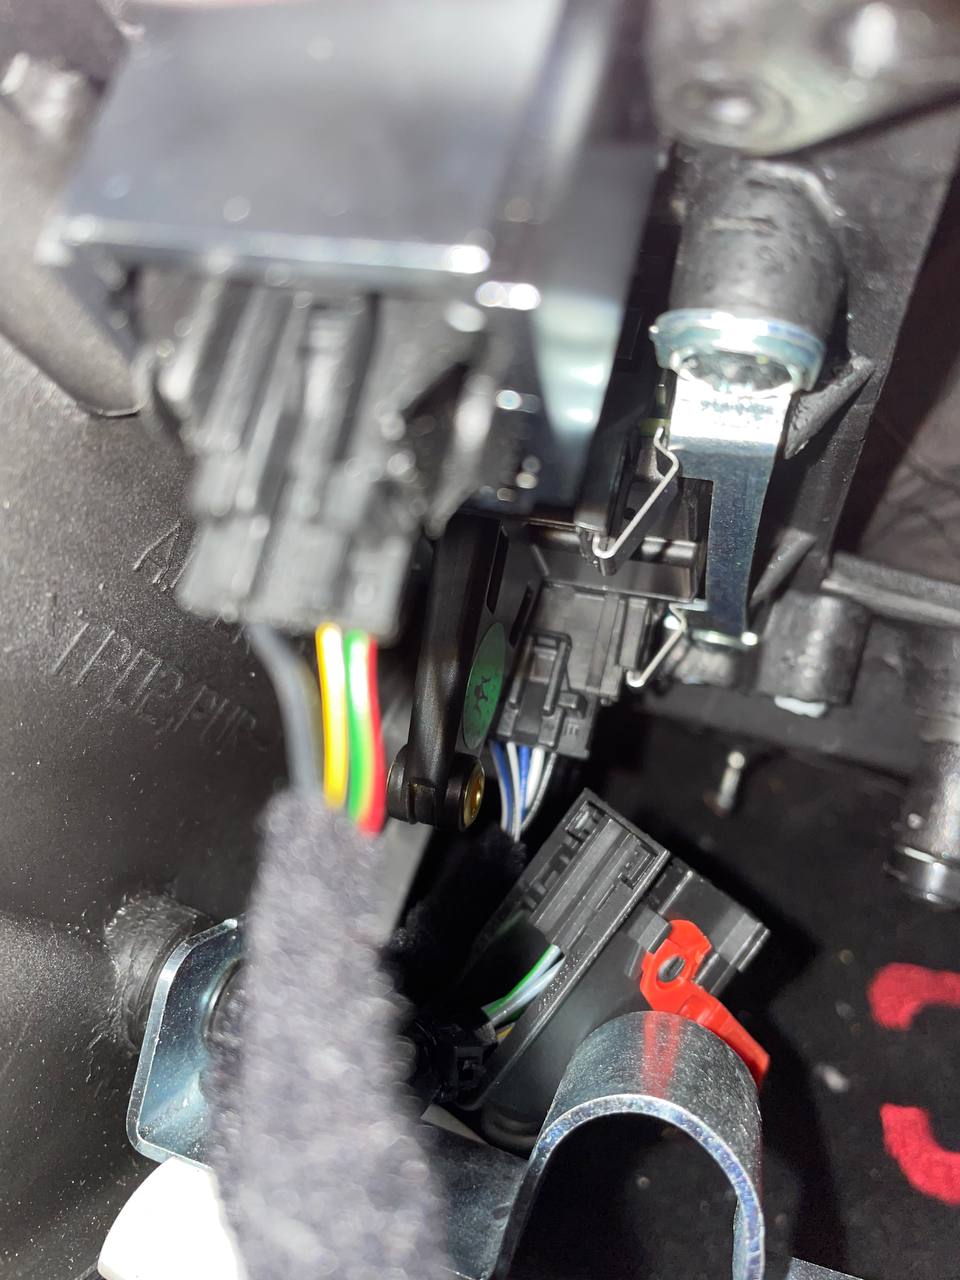
The plug for the DNA selector is the sharp one with the blue, white and black cables in the picture from within the center console. The black plastic clip fixes the harness… once this is pulled to slide over the plastic hook the harness can be removed.
moe 3. März 2023 20:47
Now, things are getting a little more difficult (just a little) as we need to unplug the DNA selector and the hazard indicator from below inside the console. Let’s start with the DNA selector.
moe 3. März 2023 20:35

moe 3. März 2023 20:35
Again, there is the plug (this time it’s black) and the plug harness can be removed similar to the one from the gear selector panel:
moe 3. März 2023 20:33
moe 3. März 2023 20:33
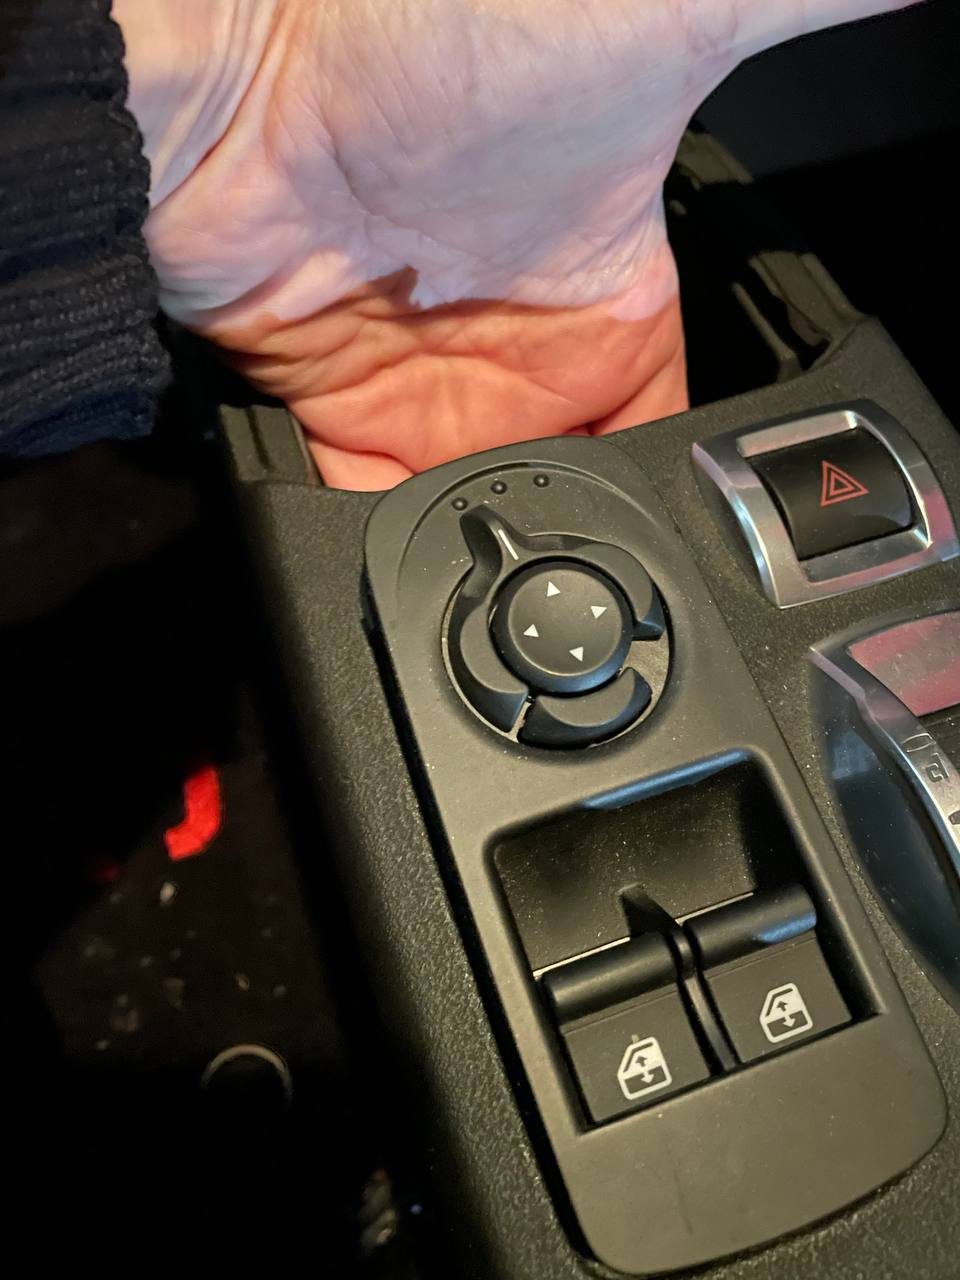
Next you can just push out the window / mirror switch panel from underneath through the hole from the gear selector. The window / mirror switch panel is fixed with 4 metal clips that also can be pushed inwards easing to dismount the panel:
moe 3. März 2023 20:22
moe 3. März 2023 20:22
Having dismounted that, we can see the brown plug harness which can be simply removed by pressing the locking mechanism next to the black plastic bracket:
moe 3. März 2023 20:15
moe 3. März 2023 20:14
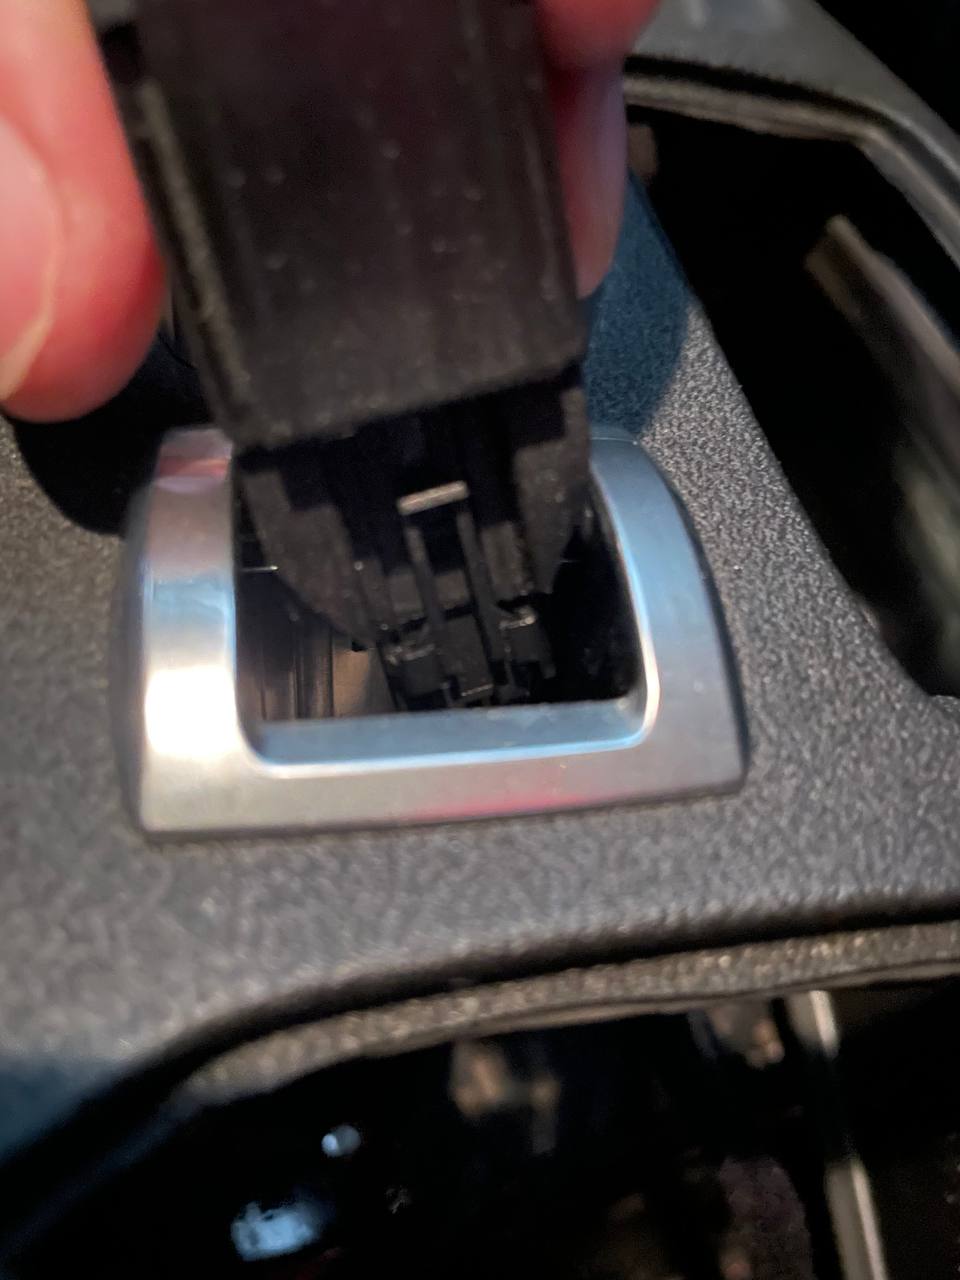
Let’s get started with the gear selector panel: this is quite easy as it is just clipped in with plastic clips holding the panel in position. The panel can be removed like this:
moe 3. März 2023 18:02
First, there is an extremely helpful post in the 4C forum, that helps tremendously: https://www.4c-forums.com/threads/diy-center-console-disassembly.24433/ I will heavily build on that and extend with my experience during (dis) assembly.
moe 3. März 2023 12:19
Ok, I have got this Koshi carbon fiber center console for the Alfa 4C… now how to get the old plastic center console out and the new (carbon fiber) in?